With some plans drafted for the chair sides, we're going to finish the chair. The goal I envisioned is to allow the chair to be dismantled if needed, so I'll be making some weird components. I opted to make some notches in the chair sides to fit the crossmember in the reclining mechanism as a means of holding it together.
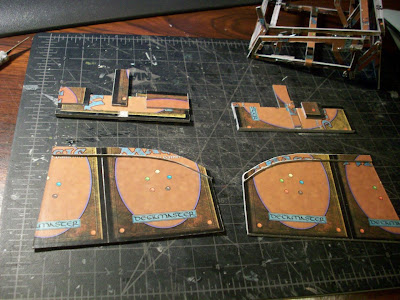
Using the
lamination techniques outlined a while back, I made some large boards 2 cards wide, one card tall and 4 cards thick using some excess X-Men TCG cards as middle filler (need to whittle down that stack) and a Magic outer covering. These will hide the joining mechanisms. Next bit of action is to make the posts for the armrests. I'll be making these in beam sections to be joined by biscuits and slots, rather than cut out large sections.

Each section is approximately 5mm thick, composed of 4 layers of 4-card thick sections. The inner section has notches cut into it before gluing. The alternative would be to cut the notches along the face, then peel the layers away. The former method allows better control over notch width and depth, as I can measure now and I know the thickness of 4 Magic cards.

There will be three parts to the armrest assembly: the front support, the back support, and the main armrest. After gluing the laminations together, they were sanded flush.

Biscuits and larger support elements were added to the members to allow better control of position when assembled. A similar method was done with the chair back.

With all the parts assembled, the chair is semi-completed. Just needs cushions. The project used up a good deal of cards, which can be seen by the dwindling stack of cards under my monitor. Both stacks used to be the same height.

To make the cushions, I wanted something spongy. Unfortunately, I didn't get what I wanted, so this crappy white plastic packing material I found at work shall do. I cut out a section roughly the shape I needed for the cushion interior.

With some useless fabric, I created a padded outer cover that would make the plastic less horrible feeling. Next step is to wrap it up in the cushion cloth. Something that looked like khaki was used.

This method is really half-assed. Since I won't be seeing the bottom of the cushion ever, I decided to assemble it by stitching it to the seat filler.

Repeat until you have this horrible looking square. Worst thing I've made in a while.

I repeated this method for the leg rest cushion, but with 4 layers of thick fabric, then sewn that to the larger cushion by means of a simple cloth. The middle cloth serves to prevent debris/legs/children from falling into the gap between the leg rest and the chair body. The straps allow me to secure the cushion to the leg rest assembly without glue, so I can remove it if necessary.

And that's the main cushion for the seat. Now, to go make the back seat cushion... then this project will be completed.


