Sunday, May 27, 2012

This Month's Progress: MORNING RESCUE

Three weeks have passed. What have I built and learned about Homura's Time Shield? I learned that no amount of Morning Rescue can make this go smoother. Here's my current project goals and the resulting mess that ensued:
 
  1. Build the most detailed Homura's Time Shield from Puella Magi Madoka Magica out of freakin' Magic: the Gathering cards. Since no one else builds with MtG cards, I'm already a winner. Hooray for shallow goals.
  2. Make the gold shutter covers for the sides open. Not "removable" where you pop them off and lose them during a convention. They must open and retract into the shield.
  3. Add loose sand. No cheating with painting the sand containers red. The sand containers must be spheres and cannot be cheap jello cups or colored gems.
With the project goals defined, time to shoot myself in the head with an AT4. Let's take a look at what I've uncovered during the course of making this.

Planning and Research

There's two principles of building this shield: Aesthetically or Accurately. Aesthetically being that with exception of the center gearbox, the shield's features are symmetrical. Accurately being the result of my research into the actual shield itself: as close to the anime concept/production art as possible. Interestingly, you cannot have both.


This particular screencap highlights asymmetry in the sand flow device. The green boxes highlight non-uniformity in the teardrop shapes. The red boxes show where the dimensions differ where the teardrops connect to the center. One can reasonably argue that this is due to the animator's decision to not bother making it perfectly symmetric since that would involve more work. Let's assume that this is a once-of error.


The line art/concept art for the shield. However, I've mirrored the half and shown it in green. Original is red. There's numerous dimensional differences. These differences also match what was in the screencap. I was led to believe that this was perhaps the result of sloppy source material resulting in sloppy details in animation.


I was about to do a "corrected" version of the shield, where everything is symmetrical. Other examples of the time shield did this, since it's easier to do and looks less odd. However, the final piece of evidence that led me to proceed with the asymmetrical design was the production notes sleeve. Brief glance, the cutout is symmetrical. Upon closer examination, there are subtle signs that the differences were intentional. It's a lot easier to replicate something that's symmetrical especially with computers. It takes more effort to make something not.

Construction

Compasses are useless. The compass lead is blunt and imprecise. It's easier to draw a circle by making two holes on a strip of paper (equaling the radius), pinning one end to the center, putting a pencil on the other hole, then looping around. It's also reliable since you don't need to adjust the compass each time for repeated passes. So much for buying a compass.

Building gears teeth-by-teeth by gluing each tooth equally spaced around a cylinder is tedious. Given the alternative of cutting each tooth around a circle, gluing teeth one-by-one is easier. Screw building gears ever again. At least they're decorative and don't need to bear loads.

My plans focused on making the shield shutters open using gears.  Worst idea ever. I do not want to cut gear teeth by hand with a knife. Archimedes did it, but I sure as hell don't want to. Did I abandon the effort to make the shutters open? Nope! After some math, I determined the dimensions to get a four bar linkage going that would open both shutter halves with a small 30 degree turn.

The plan is to have the two large rectangles attach to the shutters, then have them open up by rotating the center ring and bar. If it doesn't work, I can always just scrap it, build a static shield, and cry in a corner. My development tests have shown the concept can work; it's just a matter of not screwing it up.


Currently, here's where I'm at. The outer ridges were difficult to judge the height of, since the line art and screencaps don't give much depth about any features. I'll consider releasing plans if someone really wants them.

More progress whenever it comes. Let's hope I succeed. 50 sheep tokens are resting on this.


Sunday, May 06, 2012

Upcoming Plans - May 2012


Upcoming projects: Build the best Morning Rescue shield ever.

Scale: 1:1
Requested delivery date: August 2013
Target completion date: 3 months
Budget: Sideways 8.

This project is one of the few commissions I take on: building Homura's time shield from Madoka. My main interests in pursuing this project are building the gear housing, and trying to build something that shouldn't be buildable. I'll also be trying out new building methods in order to manufacture gears. Prototype gears have been built with moderate success. They don't need to function, so there's leeway on gear tooth strength.

End goals for this project are to have this shield be sturdy for light use, and possibly have the shield's spherical covers open up. Prospects look bad for that second goal. There's not enough design space to work with.  Maybe I'll think of something.

Once the project gets deeper into development, I'll post plans, reference material and notes, assuming it can be completed and that people want them.

Tuesday, April 03, 2012

Miscellaneous part upgrades

I've finished up a set of long needed upgrades to address a joint problem: lack of a locking mechanism to retain the pin swivel joints in place. Long overdue, but I now have the tools and tech to pull it off. The main priorities were to upgrade the arms with this new tech, then the legs.

The mechanism is fairly simple, but annoying to build by hand in multiples. The principle is to use a locking ring clamp around a groove in a pin. The ring must have an opening to behave like a spring, so it widens as the pin passes through, but contracts after the groove reaches the position. The ring should then hold the pin in place but also allow for rotation. Much easier to do with plastic parts than Magic cards and paper clips.

The main components required are a cylindrical pin, a spherical shape at the top of the pin, a sleeve and a metal ring. The sleeve is comprised of two halves: the lower half that covers the pin, and the upper half that houses the sphere. Between the two halves, the metal locking ring rests, and will lock into the groove created by joining the sphere and pin. For the pins, I used the trusty cube to create 6.35mm diameter pins. The spheres were built using a tapered 90mm long strip of 110lb cardstock rolled around a 3.175mm (1/16") diameter bamboo stick.

In order to create uniform diameter sleeves, I had to build some tooling. Rolling up some paper around a bamboo stick, I now have roughly uniform rods to roll Magic cards around. These were built using a simple excel spreadsheet to calculate diameters in terms of paper lengths and thicknesses. I had some old ones from a few years back, but re-made some new ones to help do fit checks. Probably would be easier to use drill bits since metal doesn't deform as easily as paper, but that's how we roll.

I used Magic cards rolled around the 6.35mm (1/4") diameter rod to form a sleeve with the thickness of two cards. That thickness is the minimum I found needed to allow the rings to bend outwards and also remain stiff. A strip about 45mm long is enough for the inner housing. I used another 45mm long strip to connect the two halves with the ring in between to hold the assembly together.

 For the rings, I straightened out a paper clip and rolled it around a 5.7mm diameter rod with the help of beadmaker's pliers. There's a bit of fine tuning afterwards with the finished pins to get them to lock snugly.

The new locking mechanism allows me to do another upgrade: fixing the ankles. Right now, the ankles are just a hinge joint. I opted to upgrade the feet to provide two swivel joints and a hinge joint to allow for better poseability and stability. However, the foot requires a more delicate structure due to the small envelope. Therefore, I needed to downsize the scale of the locking pin mechanism.

In order to build more delicate portions, I had to downscale the pin joint from a 6.35mm (1/4") diameter pin to a 4.2mm diameter pin. The rings also had to get scaled down. The hinge joint pictured above ends up being 8mm wide and will support a 4.2mm dia lower pin and a 6.35mm dia upper pin.

 The hinge goes into two different sleeves to form an ankle joint for a foot. The smaller 4.2mm dia pin goes into a 4.2mm dia ID x 6.35mm dia OD sleeve with its own locking ring. The ID of the ring ended up being 4.1mm. The larger 6.35mm dia pin goes into the shin.

Here's the component breakdown of the leg. The pins were left unsanded, to allow the glossy coating of the card to help reduce friction. The sanded tubes are unsanded in the inside.

Adding depth to the pins so they aren't just sticks. Was easier to super glue blocks of card to the sides, then carving them until they were round. 

Fleshing out the calves with liberal use of 110lb cardstock. 

To finish the foot, I traced out a footprint, and marked the regions to trim off on the sole. The black Sharpied out regions get cut off to form a rounded block that I can then carve with a hobby knife. Perhaps the most difficult part of the job, as the foot needed to be smooth and not look like total ass.


After long hours of not doing anything productive, I whittled down the foot to shape to something remotely considered acceptable to a blind man. More liberal use of 110lb cardstock fleshed out the shape of the legs. After this, it was ready for a coat of "pale sickly girl" paint tone.

The new foot and ankle fixes some problems with articulation, allowing for better balance and stability. I can now reduce my reliance on obitsu stands, at least for barefoot poses.


I'm quite happy with the stiffness and strength of the new joints. I do have to upgrade two more dolls with this mechanism, assuming nothing goes bad with Hotaru's new ankles over time unexpectedly.

Sunday, March 04, 2012

Kshatriya + Obitsu Stands = Fun

 I recently purchased a 1/144 HGUC Kshatriya from the Gundam Unicorn series. One of the comments I've seen floating around is that there's no means provided to display all 24 of the funnels. It's a shame, as you can't have the full glory of Kshatriya annihilating enemies with an overabundance of laser spam. All I've seen people do with their kits is pose them in the usual flight config with an Action Base, or standing on a table. Nothing with the funnels. How hard could it be to display them all?


A while back, I had bought three Obitsu Multi Purpose Clear Stands to try out. I was quite pleased with their performance. I had recently bought three more because they were that awesome. This is my 6th and last unassembled stand that I was saving up until now. Where are we going with this? We'll find out!

 I discovered something about the funnel's attachment point to the wing binders and the shape of the Obitsu grabbing claw tips: they snugly fit with each other without modifications. Each stand comes with two grabbing claws. Theoretically, each stand can hold four funnels. I already have six Obitsu stands. Worked out better than I expected.
 
With some fiddling with the arrangement, you can finally have your Kshatriya with all funnels fully deployed. Too bad I have nothing that requires 24 funnels to kill. I did come across another problem that this configuration brings: I don't have 24 beam effects of the same color. Per the series, all the beams are green. Kshatriya comes with two beam sabers, which provides... two beam effects. Still 22 short. Luckily, like a pack rat, I kept the runners.
 
The best I could do was to cut up the runner to form two additional beam parts. 

Using the stand itself to support the beam, and the tip of the funnel itself, you can get mid-shot effects with some mounting tack. I sure don't have more stands to hold up these beams by themselves, and this method worked out quite well.

 Can you say, "screwed"? 

This was the first instance I had where I used every single type of stand I owned to do a single photo: six Obitsu Stands, one MMS stand (for the Zephyrantes), and an Action Base. This setup also takes up an ungodly amount of room to display, which is a shame since I'd like to keep this display on my shelf. It does need more beam effects though.

For a low budget method, you can just use black/white electrical wire and mount the funnels to the tips. Although, you'd need to fashion some weights to hold them down. The cost of six Obitsu stands is practically the cost of Kshatriya itself, so I wouldn't suggest anyone to go out and buy them just for this purpose. Although I don't think any Gunpla builder would have these stands to begin with.

Monday, February 20, 2012

Alternate Weapon Ideas For A Strike Rouge

Still fiddling with Gundam kits at the moment. I had recently bought the Strike Rouge and Skygrasper/Aile Striker set. A month or so later, I finally completed it in a state that I'd consider "partially acceptable". There's plenty of reviews about the kit, so I'll spare you the crappy assault of "build progress" photos and "poseability" photos demonstrating how the articulation works. This is the Vortex! Only useless information that no one wants will be shared here!

For the inquiring minds, the PG Strike (and presumably all other Perfect Grade kits) stand roughly 12" tall, which conveniently is the same scale as a 1:6 scale figure. Unfortunately, their hands are quite large and don't translate well to a 1:6 scale figure, and feel more like 1:5 scale hands in size. While off scale, this does provide an opportunity to all you PG Strike owners who want something more desirable in their arsenal than the included beam rifle, shield and shiny sword. What if you wanted to give your Strike Gundam something more... interesting?

Let's put on our thinking glasses and brainstorm! Where else could we find some crap to give our Gundam to use? Stuff that's roughly 1:6 scale, and would be used by a military fighting robot? 
 
 To the gun rack!

 Since the hands are a bit larger than 1:6 scale, the Strike is limited in gun options. Guns like the M-4/M-16 with small thin grips are almost out of the question. Even if you happen to have one that sort of works, the fingers tend to overhang the trigger guard, so you end up like the Heavy Weapons guy holding... practically anything other than the minigun. My solution was to cup the grip with just the fingers, and that placed the trigger finger around the right area so it doesn't look oversized.

Guns with a stock work well, as the grip occupies more space in the hand, allowing you to use the thumb more. So if you want to give your Strike some 1:6 scale guns, stuff like hunting rifles, shotguns and the like work well. Pistol grip weapons, not so much. I'm certain that a MK23 or a desert eagle would fit nicely. A Tokarev... not so well. I also tried out the MGL, and that didn't work. The fingers just didn't want to work with it.

Now, what about heavy weapons?

The Strike's hands seem to fit a Dragon Browning M2HB quite well. All four fingers fit around the rear handles and the thumbs are close enough for the trigger. However, the main issue with giving your Strike the M2HB is that you really need to put your Strike in a trench. It can do some prone poses, but not enough to make the M2 work without putting the gun a little higher. Not quite a satisfactory addition. It's acceptable if you wanted to make a support gunner out of your Strike. 


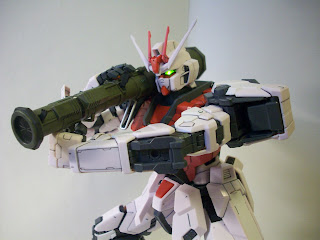
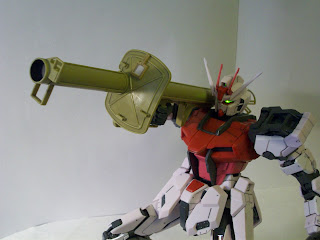
After a long while, I finally found a use for my ZACCA bazookas. They look great on the Strike Rouge, and the size fits nicely. However, there's a significant problem with giving 1:6 scale bazookas to a PG Gundam, and that's related to how their hands work. They don't have enough wrist articulation like you get out of most 1:6 scale human bodies. They're on ball joints, so you have a limited cone of range whereas human figures get wrists that can almost go 180 degrees. That makes most bazookas unsuitable for a Gundam.

I tried out most of the bazookas/rocket launchers I had and found a lot of not-at-all surprising results. I took photos of the ones that worked best.
 
Soldiers of the World/ZACCA M20A1: mediocre. Hands fit around the trigger perfectly, but the limited wrist motion prevents you from holding them correctly. Shoulder armor interferes with the shoulder rest, so you'll need to be creative with your poses.
 
ZACCA Panzerfaust 3: Great.  Nothing interferes, and there's enough range of motion to hold it properly. Can almost look down the scope as well.


ZACCA M136 AT-4: Great. Since you hold it with one hand on top, the oversize hands for the Strike work well. The front grip's easy to hold. The shoulder strap should be glued together on the AT-4, but otherwise a good addition to the Strike. It's one of the more elegant rocket launchers you could have in your collection.

 ZACCA Panzerschreck: Mediocre. You're going to have to hold this with one hand like the M20A1.  No chance in hell you can get the second hand to hold it in any decent manner. Looks great, but you just can't hold the thing. This is where a better wrist motion would help a lot.

Other notes:
I couldn't get the FIM-92, FIM-43 or the SA-18 to work due to the wrists. If you wanted a Strike Stinger combo, it'll look awkward. Don't even bother with panzerfausts. Other models from the ZACCA collection simply didn't work due to the shoulder armor interfering.

There's one outlet left for 1:6 scale weapons: Melee!

Let's say you felt the Grand Slam sword was a bit lacking, and the beam sabers were pretty dull. We can fix that with a Moonfire/Bloodberry! I did find that the fingers worked well to hold the hilts for my Bloodberry and Moonfire, but unfortunately the Moonfire's weight was too much for the fingers to handle. I had to play with the fingers to get them to clasp shut around the hilt. I could use some blue tack to attempt to hold the sword in place, but you will need to use quite a lot to hold it in place. Moonfire's the heaviest sword I have currently, almost twice the weight of the Grand Slam, and without hand pegs to hold it into place. The hands are capable of holding thin objects such as polearms, so it's feasible to have other swords (much like the Red Frame Astray) without relying on the hand peg.

It's convenient to know that a PG Strike can use about half of the possible 1:6 scale stuff on the market. The biggest problem is the wrists. I would recommend experimenting with other melee weapons than guns or rockets, as they offer the best results. Don't settle for energy blades when you can use a slab of metal to impale your foes.

Monday, February 06, 2012

Presenting the worst implausible plane ever

Decided to take a break and build stuff that doesn't require me busting out a slide rule and protractor. Picked up a Perfect Grade Strike Rouge and the accompanying Skygrasper. I had finished up watching Gundam Seed Destiny recently. That anime makes a good drinking game if you take a shot per every 5 minutes of re-used footage, and have a death wish. I actually don't care for the Strike Gundam much, but I read it was a very good example of a perfect grade model, and I need more puppets/test subjects.

I liked two things about the entire SEED series. The Moebius Zero, and the Skygrasper. Well, three if you count the pilot for both of these. The Moebius Zero model involves a lot of painting. Anything I paint looks five times worse than if I left it in primer, so that was out. What was left was the PG Skygrasper, which doesn't involve painting. Hooray! I decided to roll with that. And since it comes with a Aile Striker pack, I figured I'd get the Strike Rouge so the pack isn't worthless.

I found myself liking the Skygrasper less after examining how the model was designed, as a vehicle and as a model kit.

Landing Gear
This model does not offer any folding landing gear. There's actually NO space in the fuselage or engines to modify to fit the landing gear in. The space under the cockpit  has room for half the wheel diameters before touching the pilot's feet. If you were dreaming of modding this to have working landing gear, no luck buddy.

The front landing gear actually can't fold in even if wanted to. The canards and the region where I presume hardware exists to control them blocks the region where the wheels would fold into, and there's actually a panel that obstructs the wheels anyways. The panel lines don't even suggest that this panel moves. It has a protective flap to top it off. The front flap's existence is to solely allow you to get a fingernail under the landing gear cover to remove it.

The landing gear has four wheels, two on the front and one on each rear strut. The wheels are molded separately, and are attached by friction pegs. They do not freely spin at all. If this is the case, then why did they put a flat on the wheels? To stop the non-existent movement the wheels have from making the model not slide? Now you have to precisely orient the flat sides of the wheels on the ground, otherwise it looks odd. I guess it's to replicate a loaded tire?


The Main Cannon
Oh boy, do I hate this stupid cannon. How bad can it be, you ask?

This gun is a detriment to the plane in so many ways, it's not even funny. Actually, it is quite funny. First off, it's the size of something that should be mounted to the side of a battleship, and not a plane. Its so large, that if you turn it perpendicular to the fuselage, the profile of the gun would theoretically disrupt airflow to the tail fins and create control issues. The turret can spin around and easily smash the tail fins with the cannon barrel, so the tail fins are doubly worthless.

The best part about this cannon is the elevation. It can change the elevation to aim at targets in a fairly good cone. It's great for tracking targets. Its also great if you had a really bad day and wanted to kill yourself, as it can shoot into the cockpit. And the engines too, if you wanted to go out in a fireball.

I can also presume that the Skygrasper has no ejection seats.  If you consider that ejection involves shooting out the canopy first, you'll also need to eject the turret too, otherwise the seat will collide with the long barrel. Then again, pilot safety is low on a Gundam series' mechanical design department.

The turret is the only outlandish part of the design, and it would have been acceptable if the rest of the plane was designed in an absurd manner. I removed the turret and plan on replacing the hole with some sort of cover or fan or anything that isn't an obnoxiously large gun. I find that the plane looks much better without it. If I was so inclined, I'd cut away the turret ring and make it transition to the front fuselage better.

The Color Scheme
I just don't like the blue. It's too bright and not fitting for a military plane.  So despite my original plan, I decided to paint this. I chose to replace all the blue with "gunship grey" which turned out to be the same as "Bandai plastic grey". Whoops. Still looks better than an elementary student's coloring sheet. I did like the yellow though, so I kept it on the intakes. I would have kept it on the engine/gun pods, but I damaged those with a large fissure, and required painting to hide that.

I've finished my first attempt at painting over the blue, and have removed the turret. I think it looks a lot better.  Just need to detail the cockpit.

Anyways, enough about the plane. The kit comes with three pilot figures, which is weird since the plane is a two-seater. I've also never recalled two people being in one Skygrasper in the series.

Gundam Seed was a bit hazy. I recall the pilot's name for the Skygrasper starting with an "M". I did my best to paint him like I remembered how he appeared in the series. I think I was spot on.
 
And who can forget the scene where the Skygrasper pilot M-something docks with the experimental Mobile Pants, and riverdances over the enemy forces in a might of Celtic flurry.

I still have quite a bit of work to do on the Skygrasper before I'm happy with it. Once that's done, I'll have the Mobile Pants part to fix up. I think I can see where the next few months are (not) going.