Monday, January 31, 2011

Miscellaneous Updates for January 2011

Time for some much needed updates. I've previously showcased unpainted models of the Sticky Launcher and the Pancor Jackhammer, in unpainted states. I finally got around to painting them.

Not the most exciting model I've done, visually. The wood color was done using a dash of Dark Red, liberal use of Flat Brown, and some Rubber enamel paints. The green was done with a mix of Dark Tan and Dark Green. The rest are standard Greys and Flat Black/Grey mixes. Figured I'd post what I used so I'd remember if I ever needed to make another one of these things. I coated the trigger button with Loc-tite to improve durability and reduce the paint from rubbing off after repeated firings.

I hesitated in painting the Jackhammer because I was certain it would look like rubbish after I painted it. It looked partly like rubbish, so I think I succeeded. I covered it with a thin coat of black acrylic as a base, then used Flat Black enamels to finish it off. I chose to paint the barrel aluminum to reflect the last prototype photos of the MK3A1 I used as reference. Gave it a good contrast. The barrel was coated with a layer of Loc-tite glue to help reduce wear on the sliding pump.

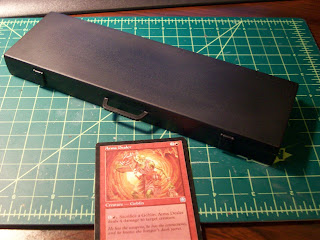
With older jobs out of the way, time to showcase some loot. The second Minigun, S/N 0002, was successfully bartered for foodstuffs with someone with way more skill than I do. Feel free to visit her livejournal, since unlike me, she actually sells stuff because her stuff is made with quality and not with freakin Magic cards.

 So I got a ramen bowl, a submarine sandwich, cookies, a chocolate heart, a chocolate bar, and the Cake from Portal. Also received a bunch of extras like a soy sauce bottle and what suspiciously looks like a package of either dried fungus or chinese herbal tea. The craftsmanship is obscene for the ramen and sandwich. I probably could have gotten more from the trade, but I'm pleased with the goods. I did trade about 12 Tenth Edition commons and 10 sheets of cardstock for it all....also considering I'm terrible at making anything other than firearms or furniture.

Now, for some post-loot trophy photos.

It's so moist and delicious!

"No."

"WAAAH! Your sandvich is longer than mine!"


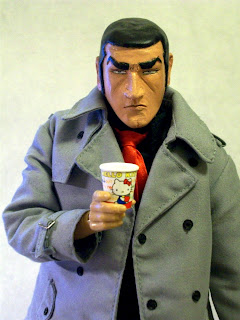
There's also one last item that I received that I shall treasure very much.  A Hello Kitty cup.

 Golgo 13 is extra manly now.

Saturday, January 08, 2011

J.Norad Reviews: Intoyz 1:6 PSG-1

 Adding to my collection of "Sniper rifles in cases", I bought an INTOYZ PSG-1 (2000, ~$15 shipped)  Been debating getting one for a while. First thoughts when I received the item was the sheer size of the carded item.

Thing is huge. 

Way larger than I expected the card to be. If you're planning on buying one online, this will explain the shipping costs. 

Out of the Box
The case is rather unspectacular. It at best resembles a Black Monolith pencil case from the 1990s with a remnant of a shop rack hangar tab on the top. The hinges are great, however, as they use metal pins. Gives a sense of confidence in repeated use with those.

 Opening up the case, we get two magazines (one in the rifle already), a folding bipod, and five spare bullets. The set comes with five spent casings, but there's no way to store them conveniently in the case.

 The spent casings are nice for dioramas, but you'll end up stashing them in a small zip baggie and storing them in a case where you can't lose them.


Details

INTOYZ has a lot of nice little details on their model. First, is the safety selector lever.

The lever has two detents to rest at, so they don't keep moving. They seem to have a hard stop as well, so you can't swivel them 360°. Also nice to have the selector markings. 

 This model has a spring loaded cocking lever so you can fiddle with it at your leisure. Not something you'd really need, but it adds to the overall level of detail. Some people tend to try moving the cocking lever on 1:6 scale guns, or maybe that's just me.

 The rifle comes with a folding bipod. It can slide along the bottom front grip of the rifle, and neatly folds up. I didn't find it too sturdy when folded down. The legs tended to bow out and the left one has become slightly loose, and tends to pop out. Something to keep in mind if you intend on using the bipod as a load bearing structure and not as a decorative item.

 Here you can see the full extent you can move the bipod back. Also visible is the safety selector markings on the right side.

 The magazine has molded bullets, but they seem smaller than the loose cartridges. not a big deal as you won't be looking at these too often side by side. They're molded well, complete with the rim.

Annoyances
 This model is pretty good. However, I have one complaint about the case. There's no ideal way to store the extra bullets in the case, as provided.

 Closed up and latched, the bullets will shift around a bit, which is expected. However, the slightest crack will result in bullets all inside the case. Fine if they haven't shifted around like the above image, but they'll tend to migrate into the bipod area and into the rifle region. I think they should have used the space for holding the second magazine and not have one in the magazine well. I'm probably going to do that since I don't like the idea of losing tiny pieces. Into the bag of loose ammo casings they go!

The main reason I picked up the PSG-1 was for my Yamato Solid Snake. I was pleased to  find that the grip slid into his stiff hands with relative ease. Snake's hands are absurdly stiff and difficult to get some rifle grips in there. The PSG-1 slid in like Snake's hands were designed for it.

 Unfortunately, his other hand isn't.

 I tried using the bipod for a prone shot, but the bipod wasn't good for supporting the rifle as it was being pushed downwards by the arms of Snake. Not a lot of figures can do this position (Snake can't do it too well), but if you do find one, the bipod should give you less problems.

Overall
I was pleased with the construction and general build quality. There are only four PSG-1 models I'm aware of on the market in 1:6 scale. One being from Hot Toys' Resident Evil line, the second being the Yamato version from the Sniper Wolf doll, and the other being ZACCA's World Weapon Collection. Hot Toys' PSG-1 is perhaps the easiest to obtain loose, with ZACCA being the rarest. However, in terms of overall detail, the INTOYZ model may be the best if you like all the little mechanical details. Molding quality and paint, I would probably guess Hot Toys' has a leg up in little molding details. However, I didn't see the right side safety indicator markings on some product images of their PSG-1.

If you don't care about the case and just want the rifle, you're better off getting a loose Hot Toys' rifle. The bipod may be too fidgety and the remaining details may be too delicate for rough play. It's a lot cheaper if you're on a budget to get a loose rifle.

On a side note, INTOYZ also makes a MSG-90 which can be bought for approximately the same price as the PSG-1. As far as I know, no one else makes a MSG-90 model in 1:6 scale.

Saturday, January 01, 2011

This Week's Project: Weight Loss Program for Miniguns

Chalk up another item on the list of "things I'd prefer not to ever redo but ended up doing anyways".

I had an opportunity to try out building something with the new revised minigun schematics I posted a while back. Seems that there's some errors that needed to be corrected with those schematics, in terms of a few dimensions being wrong. As posted, they either require longer support arms on the handle mount bracket (sheet 2), or a shorter profile on the outer barrel support (sheet 1). A modification of 2mm more on the handles or 2mm less on the outer barrel support (actually that needs to be dimensioned in general) will fix the problems. Oh well. None of you actually are using my plans anyways, so you're not affected.

Since this build used the newer schematics and improved building methods, I have officially designated this model as the "production" model. I've taken the opportunity to try out different build methods to lighten up the minigun as much as possible. Also, I've forgotten how I built it in the first place, so I had to.

The main differences in the production model and the prototype involve the larger, more liberal use of Magic cards. The whole handle bracket for the prototype was purely 110lb cardstock, whereas I've taken the opportunity to experiment with hollowed assemblies for the lower bracket. The ammo chute, power control module and bottom pipe mount were built the same way with Magic cards. The piping itself was done properly, at the elbow. I achieved a cleaner bend by notching sections of tube evenly to form a gentler curve than the atrocious abrupt elbow on the prototype model.

The drum is the biggest change. I made the drum as thin as possible knowing that a wall thickness of 1mm is sufficient for the mildly cosmetic nature of the shape, and that I was going to reinforce the middle and ends with a three card layer circle plug. There's now a taper from the aluminum section to the start of the black region, a task not feasible back then in the era of manual sanding. Having a Dremel allows for greater opportunities! The end caps on the prototype may have been constructed from a back of a art sketch pad due to the supreme rigidity. That material is also significantly heavier than Magic cards.

The minigun barrel spindle assembly was built with purely 110lb cardstock this time. I think I may have used a plastic tube in the prototype to reduce friction. That may also have been a big factor in the weight reduction.


 The rest of the build was the same as the last. Except I had no idea how I pulled off making the rear handle bracket without a Dremel. Or in general. I ended up shearing off a section in the middle and needed to reinforce it with a paper clip rod. I'll call that "planned strategic structural enhancement".

I noticed a long way though that I undersized the minigun barrels from 6.35mm to 5mm. I don't really care and I don't think anyone else does either. It looks OK as is. Makes painting the barrel assembly easier.


Here's the completed production model Sasha, Serial Number 0002 (assigned one, as though I'll be making more, but you never know). The Mini MS stand I bought a while back finally found a good purpose. Just the right height to display this monstrosity.

The build took around a week (with copious breaks in between part fabrication), and definitely was made easier with pre-existing plans. However, I had some quality issues with the large drum that resulted in a warped outer surface. That entire drum needed to be scrapped and redone, costing a day's worth of work. It's not particularly an annoying project to do, but it's not pleasant either. I did achieve a noticeable weight reduction, but not enough to allow the minigun to be properly wielded by the Heavy.


As for the fate of Prototype S/N 0001, it shall remain in possession of The Vortex as no smart person would want the flawed model (and I actually like the older one better for some reason). S/N 0002 shall be used as barter for rare and exotic trade goods.