I've been practically innundated with a single question on how I sculpt the heads for these Team Fortress 2 figures. Time to shed some light on what goes on during the 2-3 hour span a head sculpt gets done.
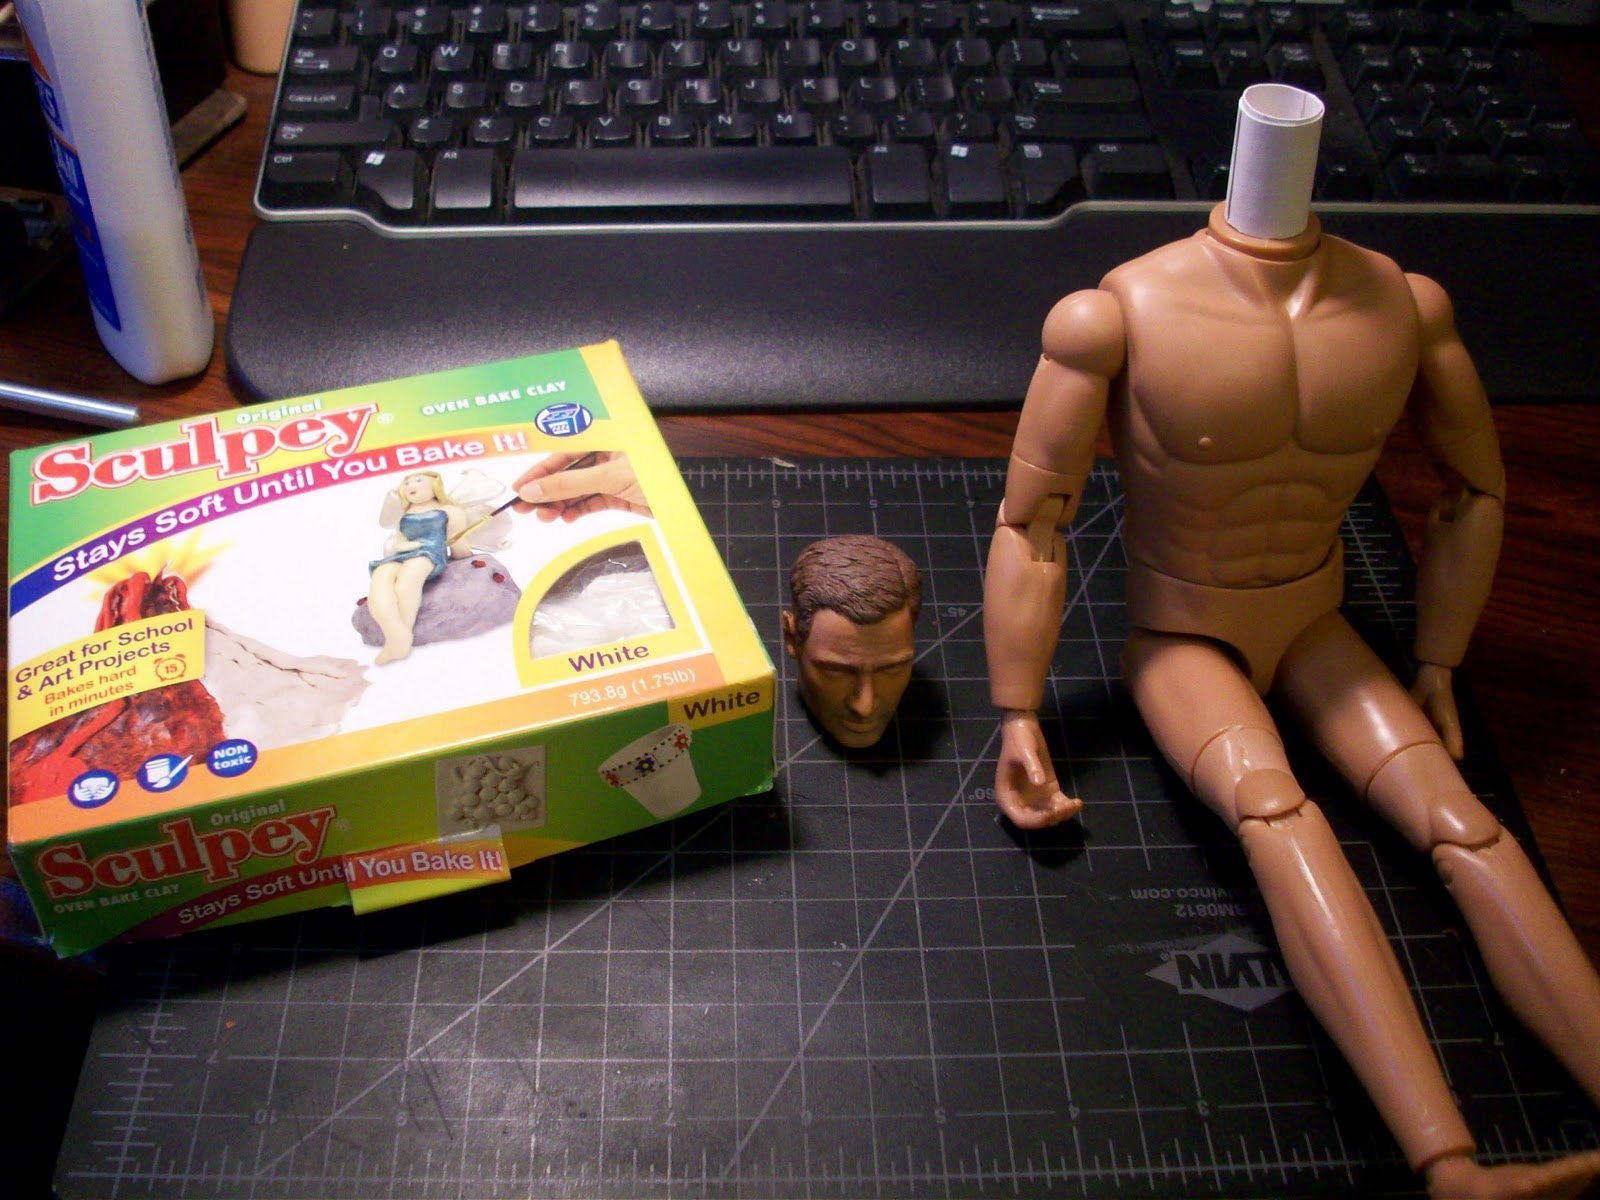
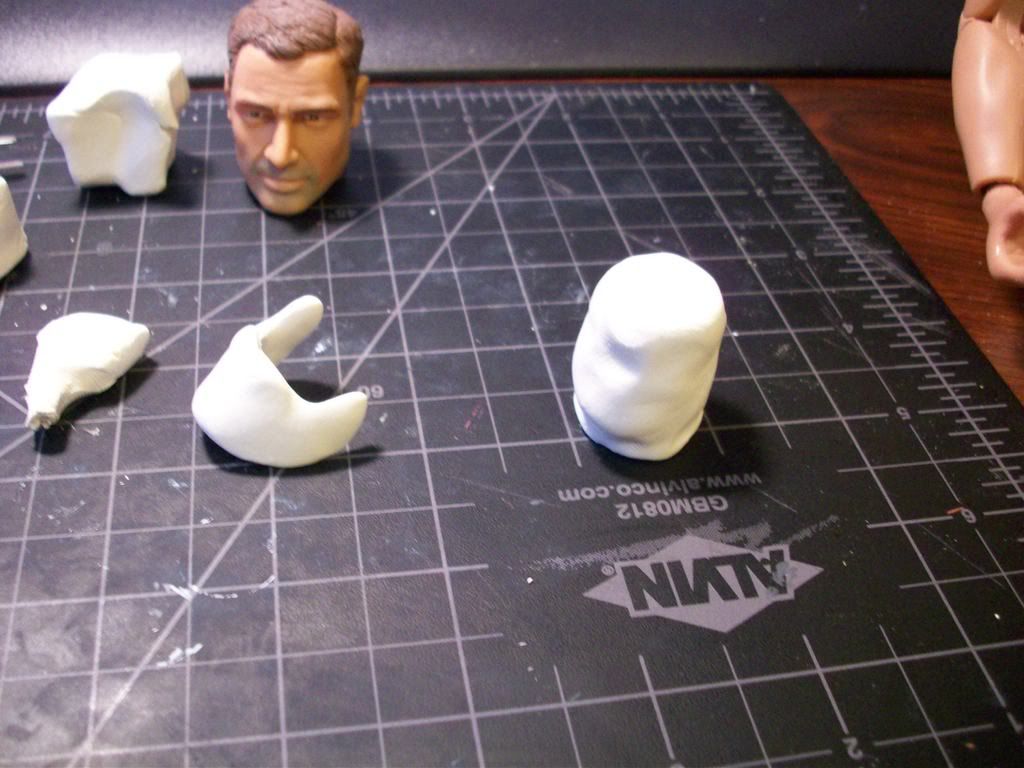
As usual, I start off with decapitating a doll. A 110 lb cardstock tube gets molded around the attachment point, serving as the base for the neck.
I put a coating of sculpey around and in the top of the cylinder. Sculpey doesn't stick to anything but sculpey, so I recommend using very lightly kneaded sculpey so it's still solid, or finding some means of making the cylinder sticky like mixing in another clay. On the left of the cylinder, there's a piece that has two prongs coming out the right. What I like to do next is make a jaw, and as you will see, that piece shapes out the side profile of the face.

Using the former head as reference, I place some clay where the nose, eye sockets, eyebrows and ears will go. This helps determine spatially what I need to do. These heads are regular, so these landmarks will be valid for all human heads.
Now for the creepy stalker headshot gallery. Every sculptor needs a good set of views of what they're sculpting. I've added a general set of features to the face, including a line for the mouth and general eye sockets for locational purposes. I tend to play with the shape of the nose now, so I get a feel of where the rest of the facial features lie in relation to it.
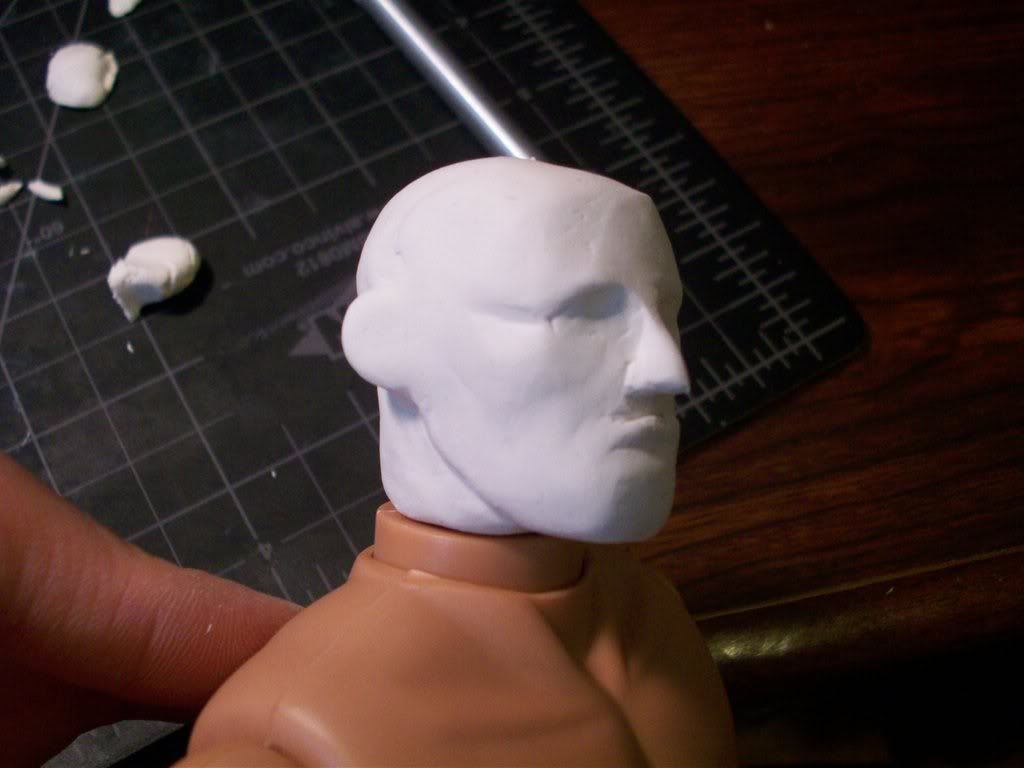
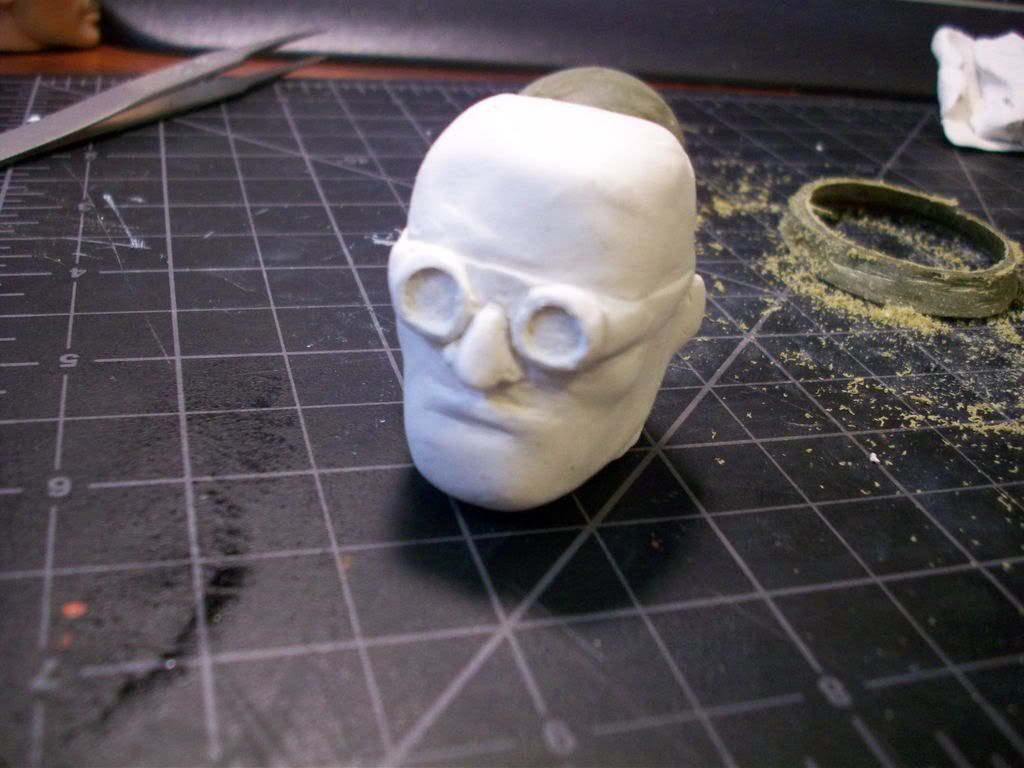
Here, I've added subtle depressions and elements to round out the face based on the headshot gallery. The chin, lips and cheekbones are taking shape now. Normally, I'd carve out a faint outline for the eyes, but the Engineer has goggles, making that wasted.
Bit more material and X-acto knife cutting, I reach this stage where the face has 70-80% of the features defined.
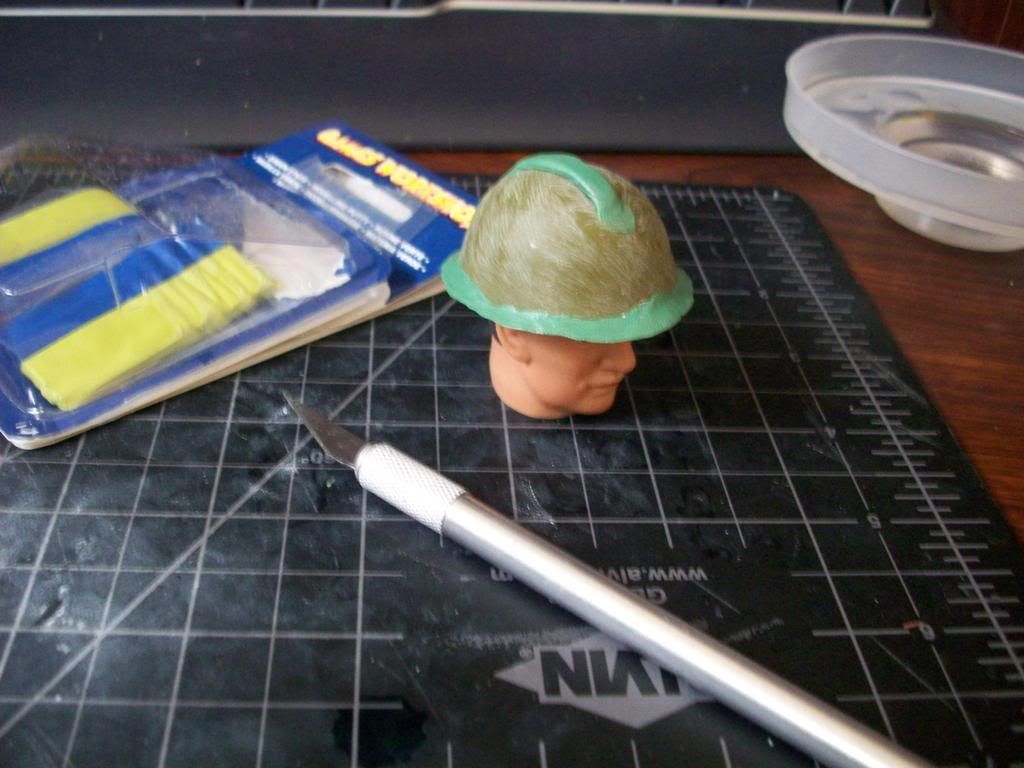
Modding a regular soldier helmet to be an engineer hat. Soldier helmets are taller and therefore need some sawing. Now to make the helmet lip and top protrusion.
Overpriced Games Workshop epoxy ($8) is a bit flexible when dry and thinly applied, and sticks well. If not, there's always Loc-tite. The shop guy told me to keep my tools wet so the green stuff doesn't stick on them. I suggest having a cup of water nearby to wet your fingers.
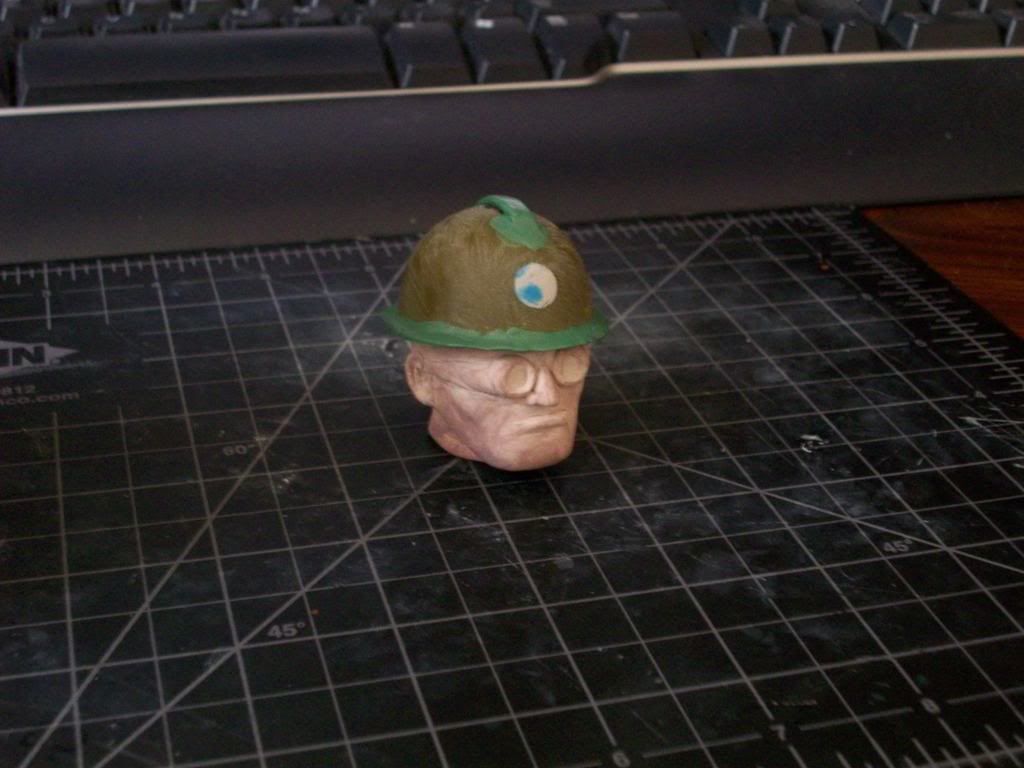
A bit of baking in the oven for 2 hours at 275 degrees Fahrenheit. Note the reddish color. That's a sign of the sculpey being solid. Really good and solid sculpey would look real red, not this half-assed pink I settled for.
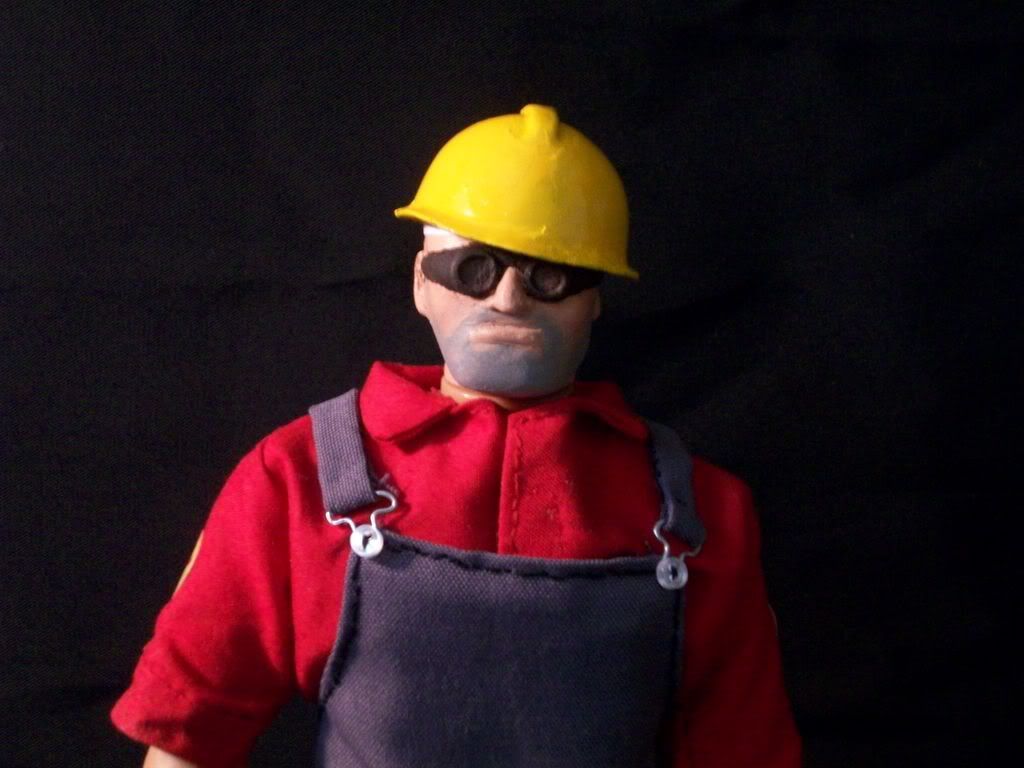
After some painting, this is what you get. To do beard stubble, I do a direct layer of grey onto the face, then before it dries, apply a thin portrait tone/flesh color layer on it. Since the over layer is lighter, it doesn't completely cover up the grey, making a lighter, stubbled beard appearance.
However, in the event your head doesn't have goggles or something covering his eyes, you'll have to do some eye painting.
 Jin Saotome has a good tutorial
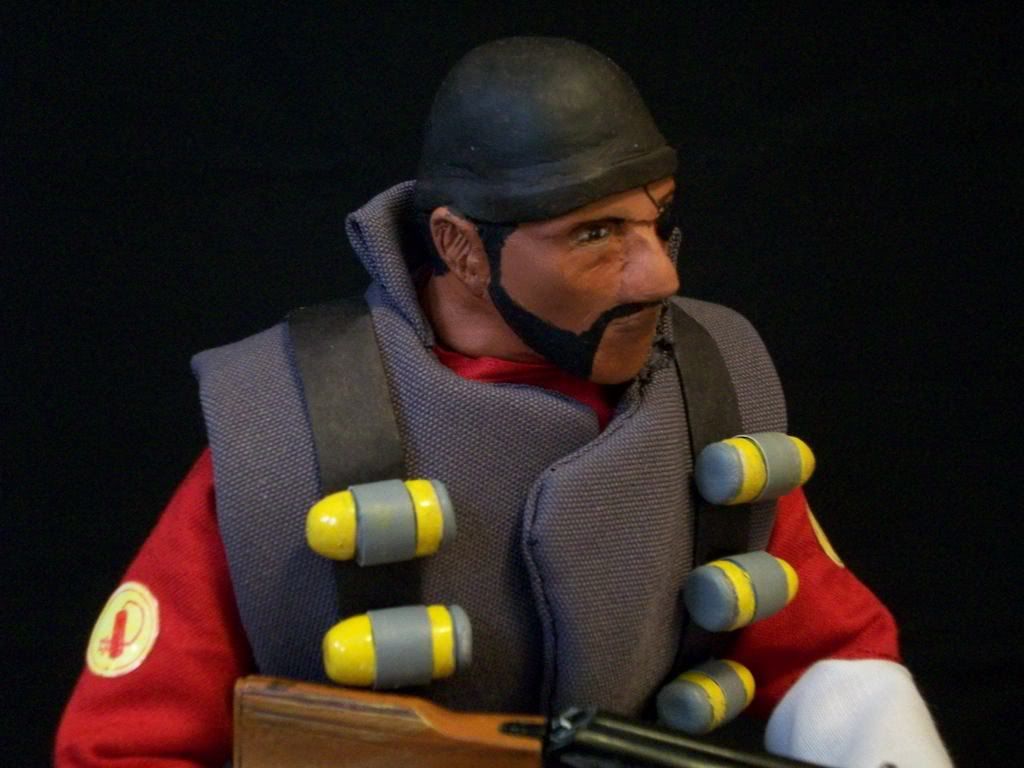
 that I half-assed (as usual) to do the Demoman's eye. I did the first half or so, since I'm not too keen on that realistic looking of an eye. Also, I have about the worst brush selection and miniature painting skill for a modeler. For people who aren't rubbish at painting miniatures or have surgeon hands, this will be a bit easier and better looking for you. I think I did the best job so far on the Demoman, since he had only one eye and I tried on that one. The Soldier and Sniper have stuff blocking their eyes, so I had some leeway with cutting corners.
That in essence is the entire sculpting process. Takes at least 2 hours to sculpt, and about 4-5 hours to get to the painting stage. You may take longer, depending on how great your spatial skills and ability to work with small details in clay are.

 The toolbox might be a bit bigger than I remember it was supposed to be. Oh well. The Engineer won't be holding it all the time. It'll mostly be stood or sat on by the Engineer. Or used to actually hold items.
 Since I'm now building to a higher standard than what I used to settle with last year, I've decided to make the toolbox house a teleporter that can be unfolded from inside the box. That involves making sure the toolbox has enough space internally while being structurally sound to fold open and closed. The toolbox has no perpendicular faces to the floor, so some simple geometric calculations were needed. I went about establishing the angles the faces made with the floor for each side, then using some trigonometry to figure how much to elongate the sides.
 The toolbox would be formed out of two single sheets to form the bottom and lid.
 Once the halves were defined, I reinforced the thickness with three layers of X-men cards. These were done in separate panels. I cut out a V shaped groove along the seams to allow the panels to fold together.
 Now that I have the envelope for the teleporter constructed, I determined the final dimensions of the folded up teleporter and scaled some screencaps to size. The above image highlights the various methods to get the teleporter to fold out and lock together. The folding arms use a sliding pin mechanism to restrict angular movement, accessible underneath the arms where it's not easily noticeable, but still accessible during the transformation sequence.
 To make the arms, I decided it was easier to form the solid arm out of a single sheet, then reinforce individual sections with more X-Men cards. The sliding pin locking assembly involved a series of double hole plates around 2mm thick. These would interface together where the arms break apart.
 A lot of the next stage is making filler to hold the components together. This involves making guide plates and empty boxes and stuffing them in the arm envelope. The outer part of the arm is just a hollow box with some reinforcement to keep the top surface from warping under additional weight.
 Here's a few views of the sliding pin locking mechanism, with the top removed. The pins can come out 2mm and interface with the outer plate without interfering. Sliding the pin out engages the outer plate 5-6mm and restricts movement fully. For the mechanism, I ended up using 5.7mm diameter rods with a 5.9mm diameter hole. Odd, since the hole punch I used should have made 6.35mm diameter holes. I suggest ensuring your holes do not deviate more than 0.5mm apart when building all three plates. You want some wiggle to slide them freely and any large offset will likely cause seizure.
 The center spindle involves two cylinders. The outer is made of two more complex shaped half circles with an array of tubes. The smaller ones allow for hinge movement for the arms. The larger one interfaces with the smaller center tube. A 5.9mm diameter rod (or equivalent clearance) eventually goes through the smaller center tube and connects the two outer halves. It needs to fit securely but loose enough to provide movement with a layer of paint on it. The rod will also interface with a hole on the base of each arm to lock them level once assembled.
 Here, you can see the hole positions. Note the hole in the right arm's base and the alignment with the outer spindle halves.
 To attach the arms, I used 3.175mm diameter bamboo sticks. The sticks do not run through the spindle halves. This allows the main connecting shaft to run unobstructed. From this stage, it's mostly decorative.
 Here's the full sequence of building the teleporter from the toolbox. All the major components are now in place.
 Right now, I have almost a full set of Engineer crap. However, highwaychile's dispenser is still a loaner and needs some improvement. Mostly needs to be rescaled, and done the proper J.Norad way. If I can figure out how to make it collapse into the toolbox, I'll make that the next TF2 figure update project. Until then, time to enjoy the glory of having a kick ass toolbox.


